
In CoreBookings, the name clients see for a class comes from its class type. You can rename the type once in Settings (which updates linked classes), change the type for a single occurrence, or update the type on a recurring series.
How class names work #
- Class types live under Settings → Class Types.
- When you schedule a class, you choose a Session Type (class type). The schedule title follows that type.
- If you rename a class type in Settings, CoreBookings updates the title on series linked to that type.
- To show a different name on one class only, assign a different class type from the schedule menu—do not invent a one-off custom title separate from class types.
Rename for every class of that type #
Where: Settings → Class Types
Use this when you want the new name everywhere that class type is used (for example rename “Vinyasa” to “Vinyasa Flow”).
- Open Settings, then Class Types.
- Click the class type (or the pencil Edit icon).
- Change the Name (and descriptions if needed).
- Click Update.
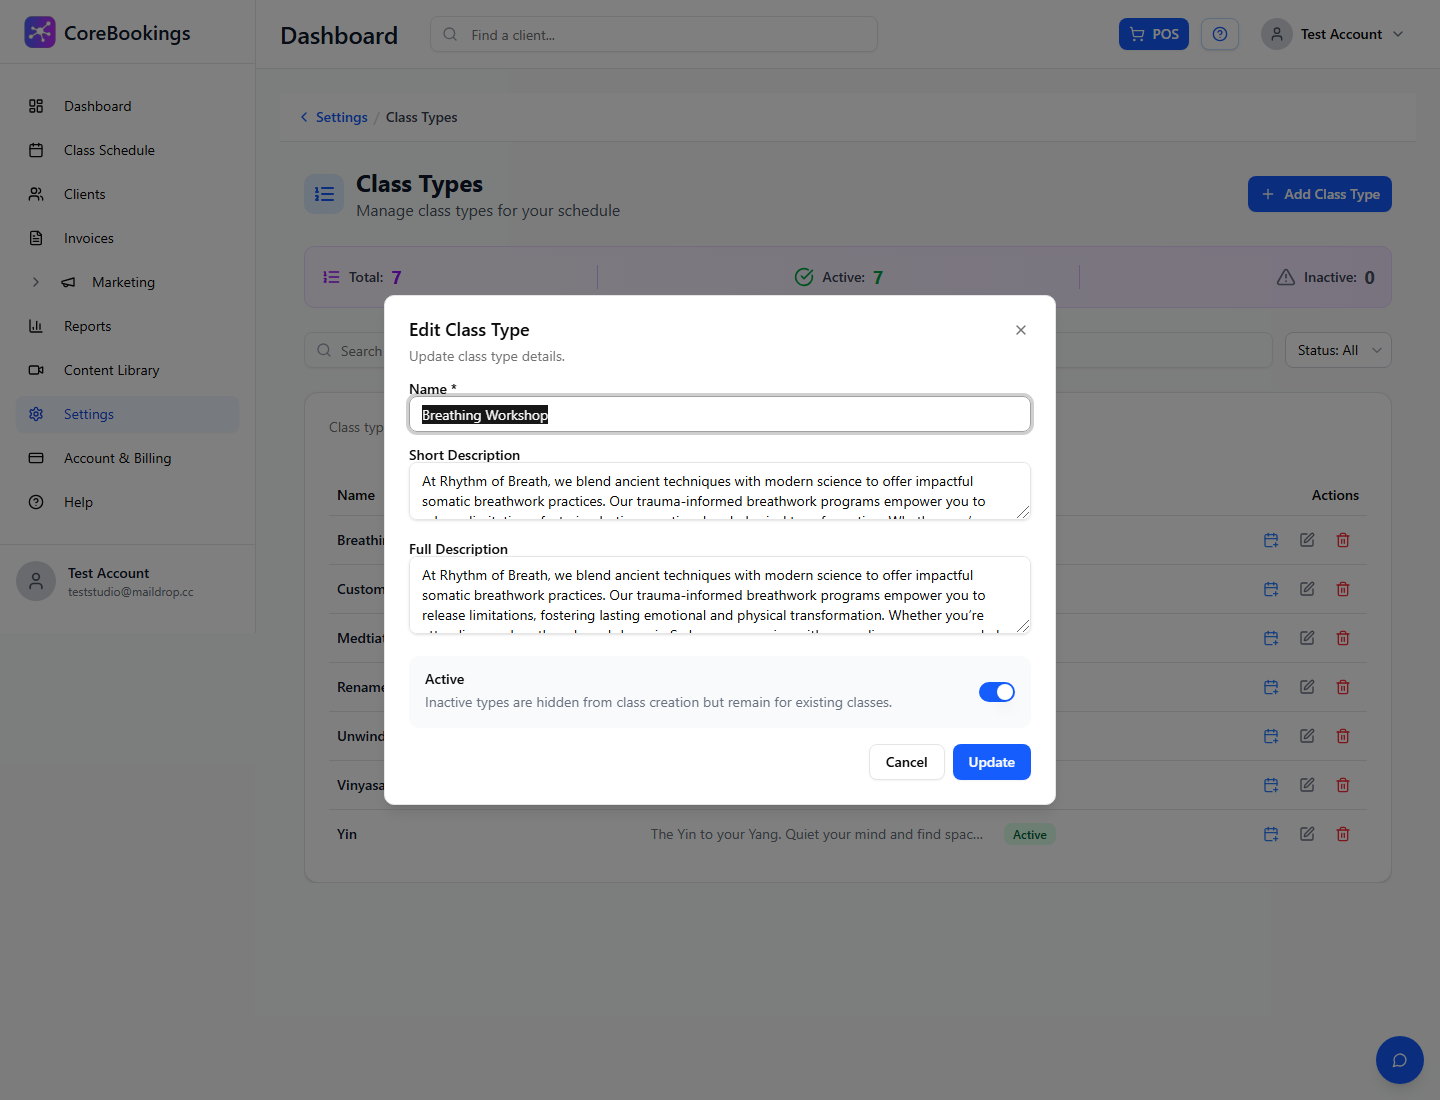
CoreBookings syncs the new name to scheduled series that use that class type. Refresh Class Schedule if the list still shows the old title briefly.
If the new name does not exist yet as a type, create it with Add Class Type first, then assign it to classes (steps below).
Change the name on one scheduled class #
Where: Class Schedule
Use this when only one occurrence should use a different type (and therefore a different title).
- Open Class Schedule.
- Open the class actions menu (Manage) for that class.
- Choose Change Class Type.
- Select the New class type.
- Click Save.
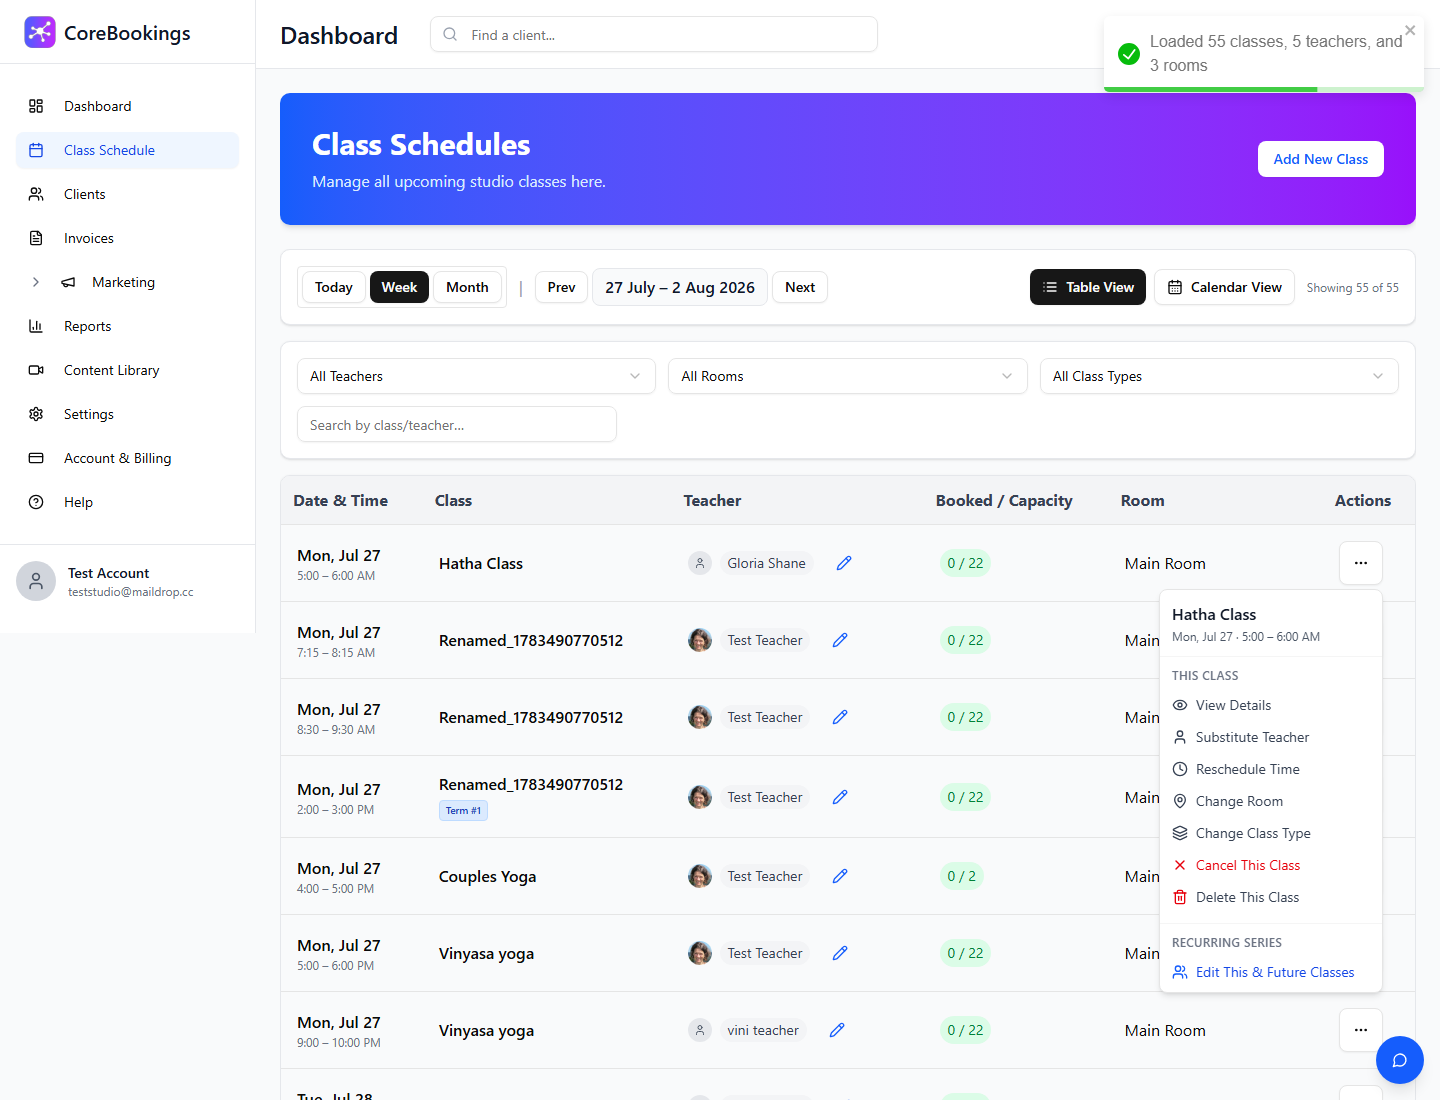
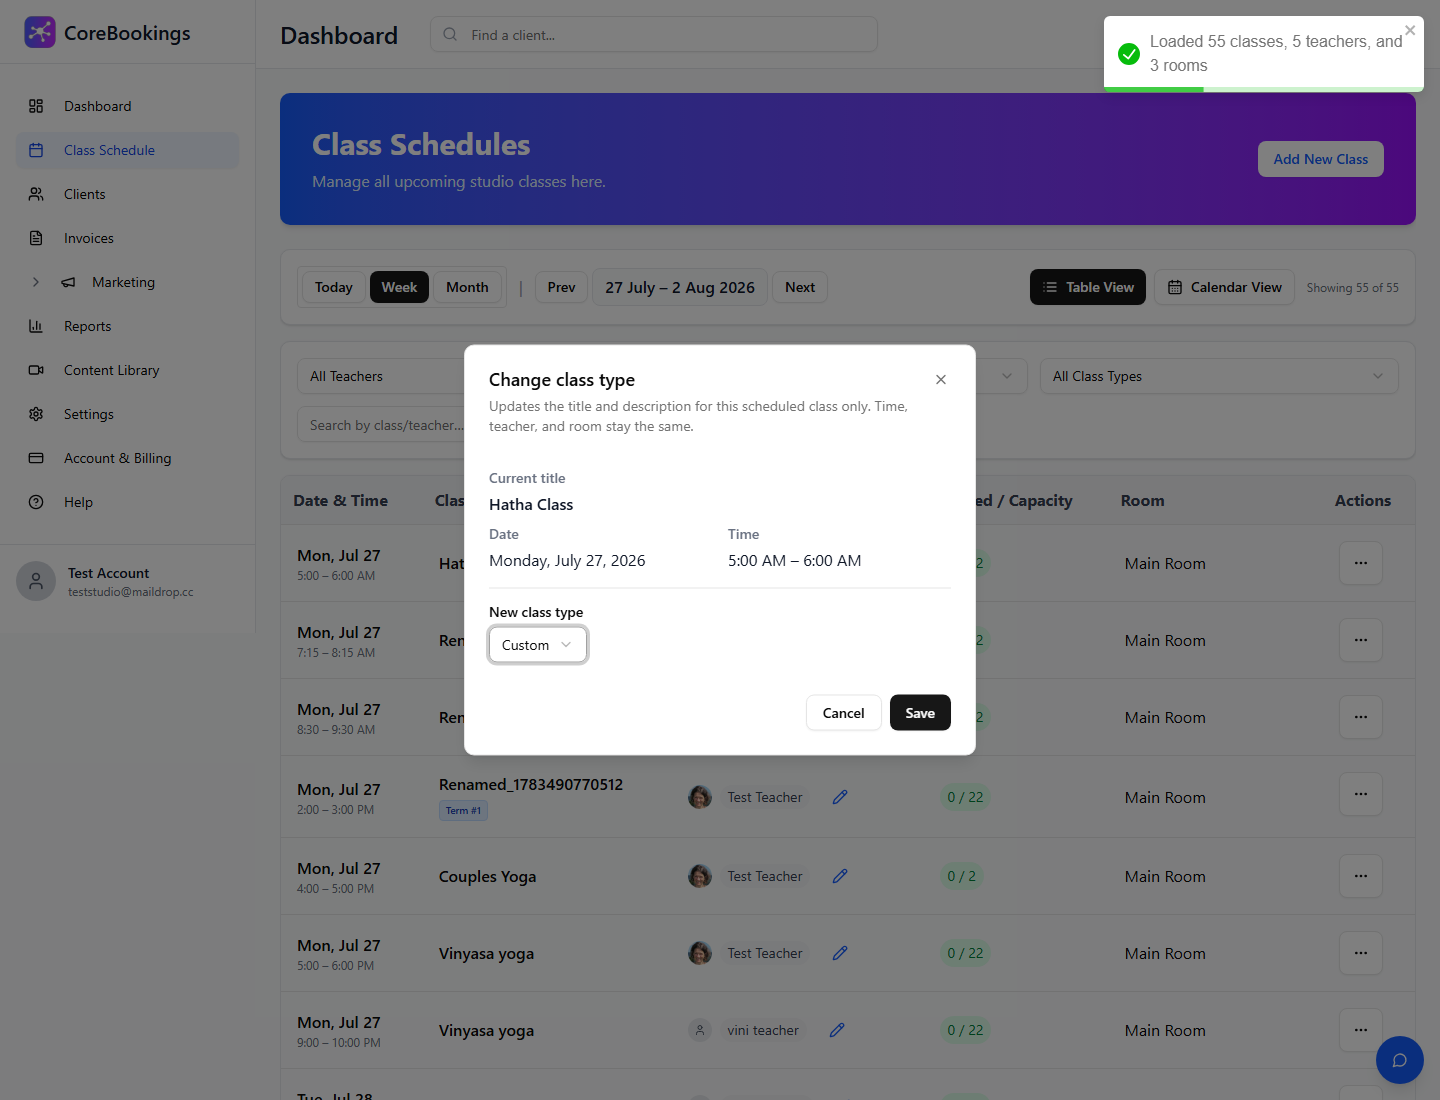
Time, teacher, and room stay the same. Only this scheduled class is updated—not the rest of a recurring series.
Change the class type for a recurring series #
Where: Class Schedule → Edit This & Future Classes
Use this when a whole recurring series should switch to another class type (and title).
- Open the class actions menu on any class in the series.
- Choose Edit This & Future Classes.
- Open the Class type tab.
- Select the new Class type.
- Click Save changes to series.
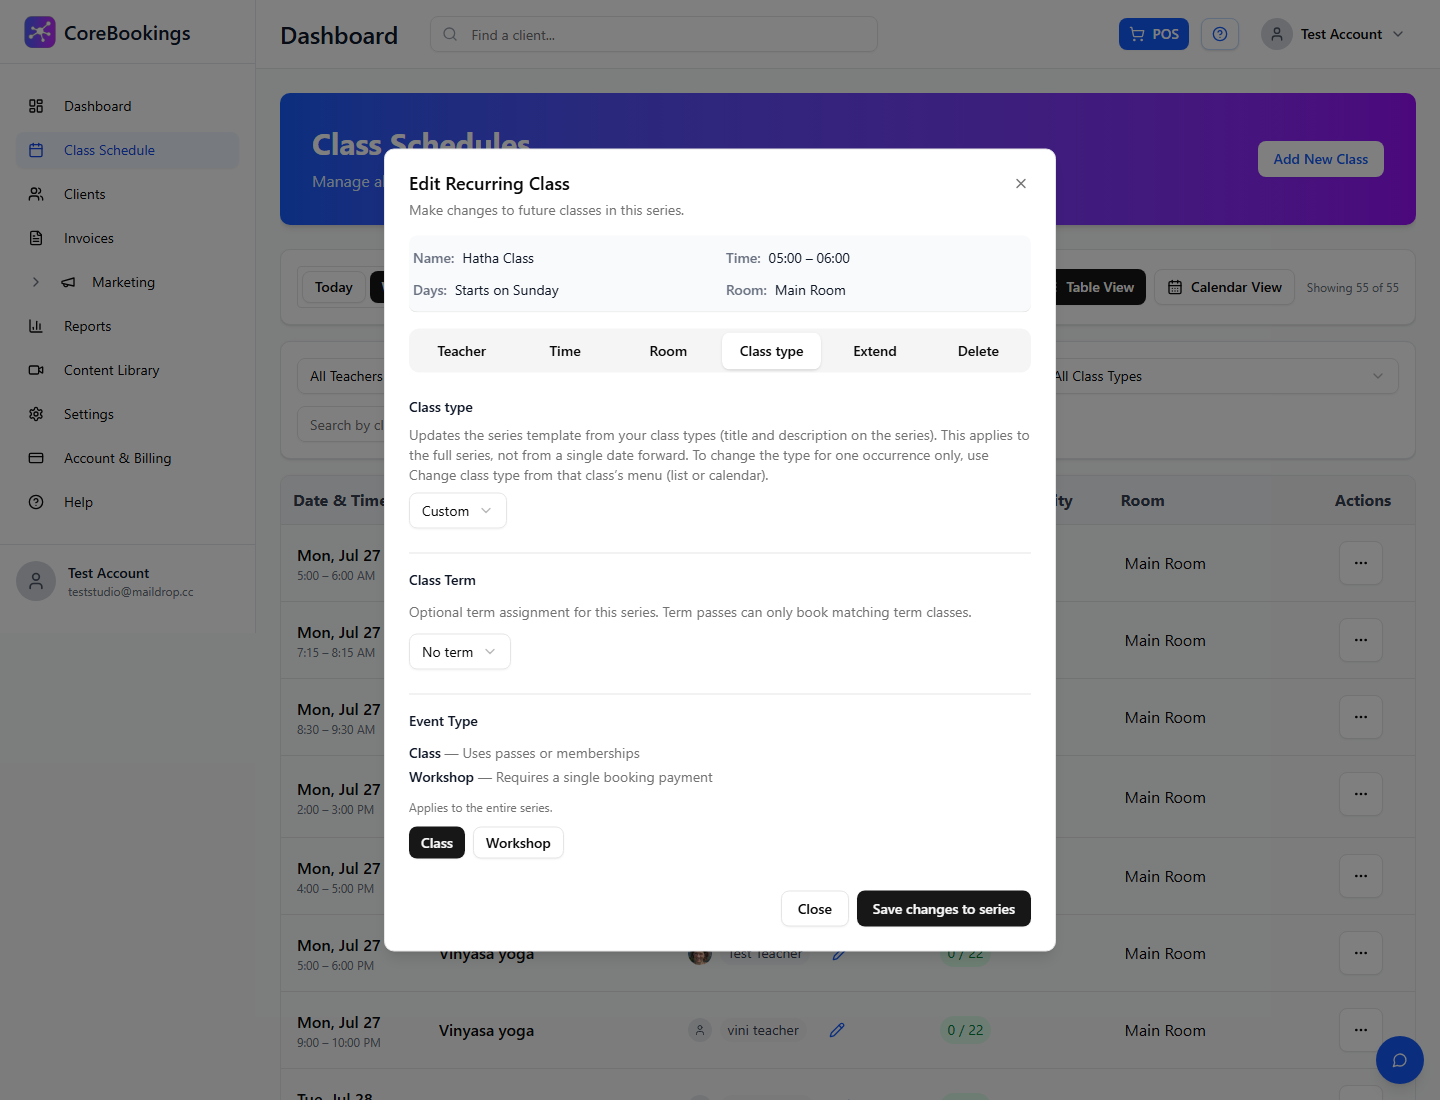
The Class type tab updates the series template (title and description from the selected type) for the full series. For one date only, use Change Class Type on that class instead.
For other series edits (time, teacher, room, delete), see How to Edit a Class or Modify a Recurring Series.


