
This guide walks through the main areas of the CoreBookings dashboard you will use when setting up your studio. If you want the short version first, start with the checklist to set up your account, which covers the four steps needed before clients can book and pay.
Understanding the dashboard #
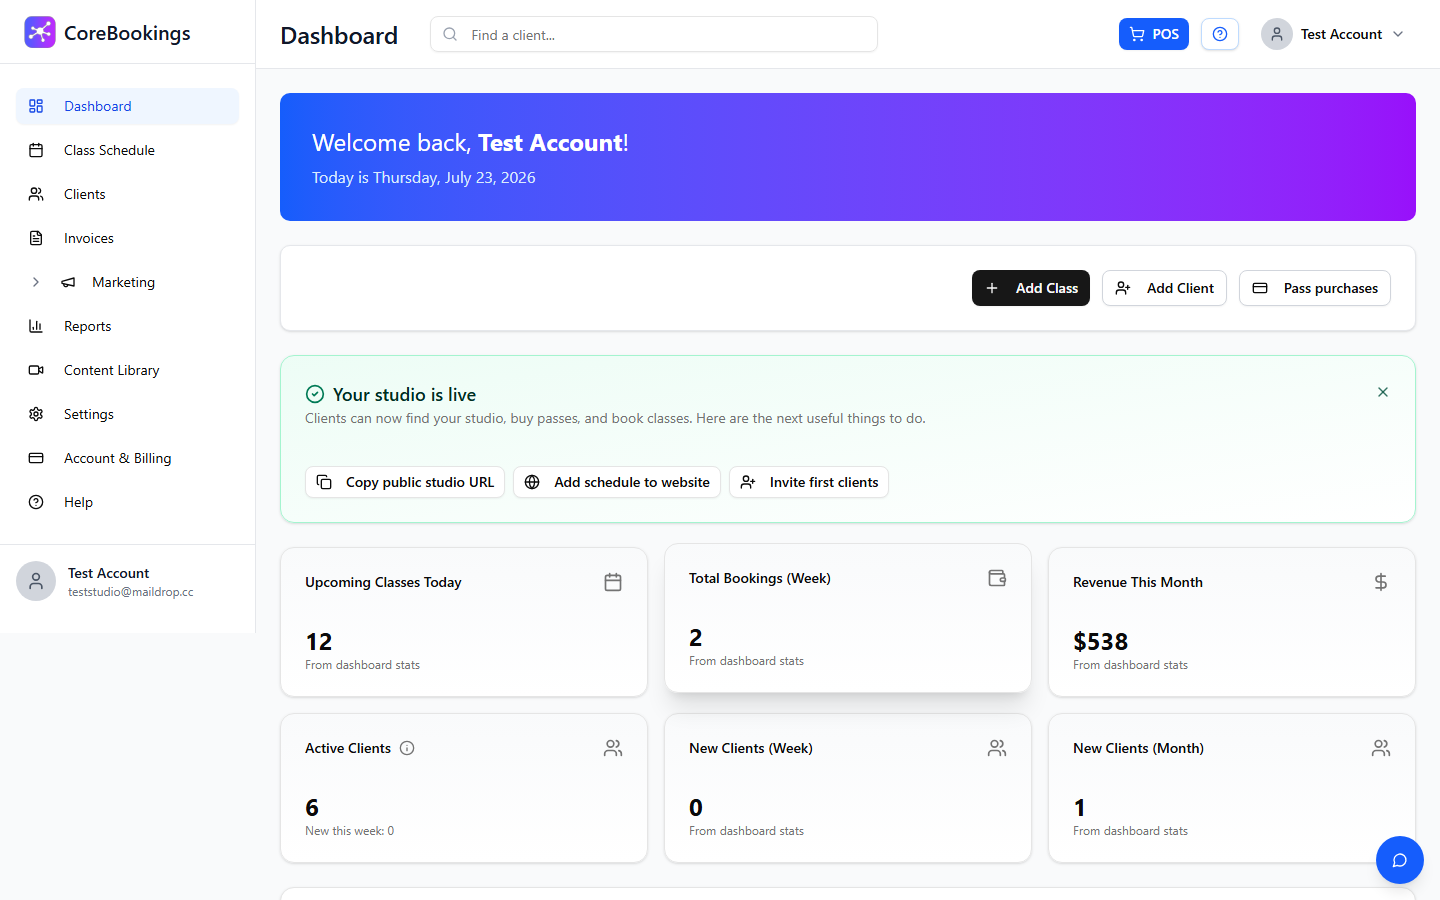
When you log in, the left sidebar is your main navigation. Studio owners and admins will see:
- Onboarding while your activation checklist is incomplete
- Dashboard, Class Schedule, Clients, and Invoices
- Marketing (Newsletters, Automation, SMS)
- Reports, Settings, Account & Billing, and Help
Most studio setup happens under Settings, which opens a tile overview of every configuration area. Use the search bar at the top to find clients quickly, and open Help if you want in-dashboard assistance.
Business settings #
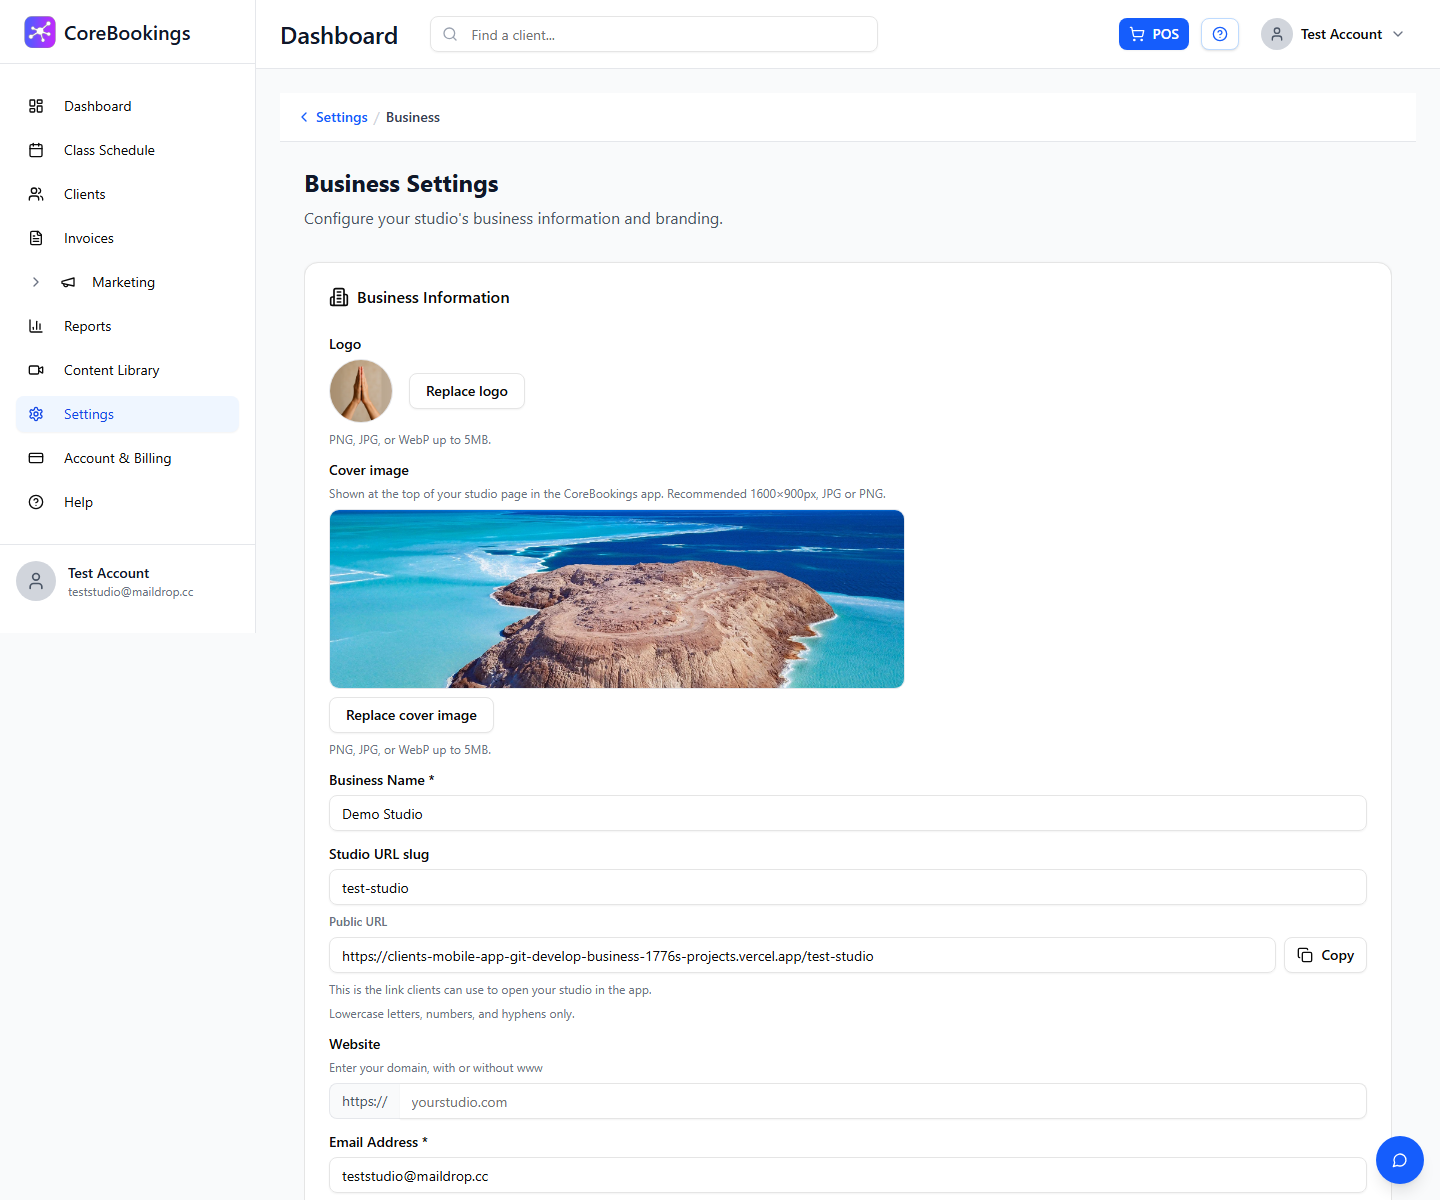
Where: Settings → Business
On the Business Settings page, add your studio name, contact details, timezone, currency, and booking policies. Important fields include:
- Studio URL slug and Public URL for your client booking page
- Phone, Email Address, and Website
- Maximum Booking Days, Booking Cutoff (minutes), and Cancellation Cutoff (minutes)
You can also configure your Mobile app listing details here so your studio appears correctly in the CoreBookings client app.
Payments #
Where: Settings → Payments
Connect Stripe so clients can buy passes and memberships online. On the Payment Settings page, click Connect Stripe Account and complete the Stripe setup flow. When connected, the page shows Stripe Account Connected.
For more detail, see Setting up Stripe.
Passes and memberships #
Where: Settings → Passes
Create the passes and memberships clients can buy before booking. The page heading is Passes & Memberships. Add your intro offers, class packs, and recurring memberships here, then edit or archive them as your pricing changes.
See also: Adding new members, deals and intro passes in the dashboard.
Coupons #
Where: Settings → Coupons
Create promo codes clients can use when purchasing a pass or membership. Set the discount amount, validity dates, and usage limits. Coupons can offer a percentage or fixed amount off.
Location and rooms #
Where: Settings → Location
On the Location Settings page, add your studio address and manage rooms. Rooms are used when you schedule classes, for example Main Studio or Reformer Room. Each room can have a name, capacity, and optional notes.
Click Add room to create your first room. You can edit, deactivate, or reactivate rooms later.
Teachers #
Where: Settings → Teachers
Add the teachers who run your classes on the Teachers Directory page. You will need at least one teacher before you can schedule a class.
Class types #
Where: Settings → Class Types
Class types are the session types you schedule, such as Vinyasa Flow or Intro to Pilates. Add a name and description for each type. These become the Session Type options when you create a class.
Add descriptions now so clients see the right information when they browse your schedule.
Notifications and email templates #
Where: Settings → Notifications and Settings → Email Templates
On Notification Settings, choose which emails your studio sends to customers, teachers, and owners. You can set your reply-to and BCC addresses under Email Configuration.
On Email Templates, review and customise the content added to booking, purchase, and welcome emails.
If you use a waiver, configure it separately under Settings → Waiver.
Schedule and classes #
Where: Class Schedule
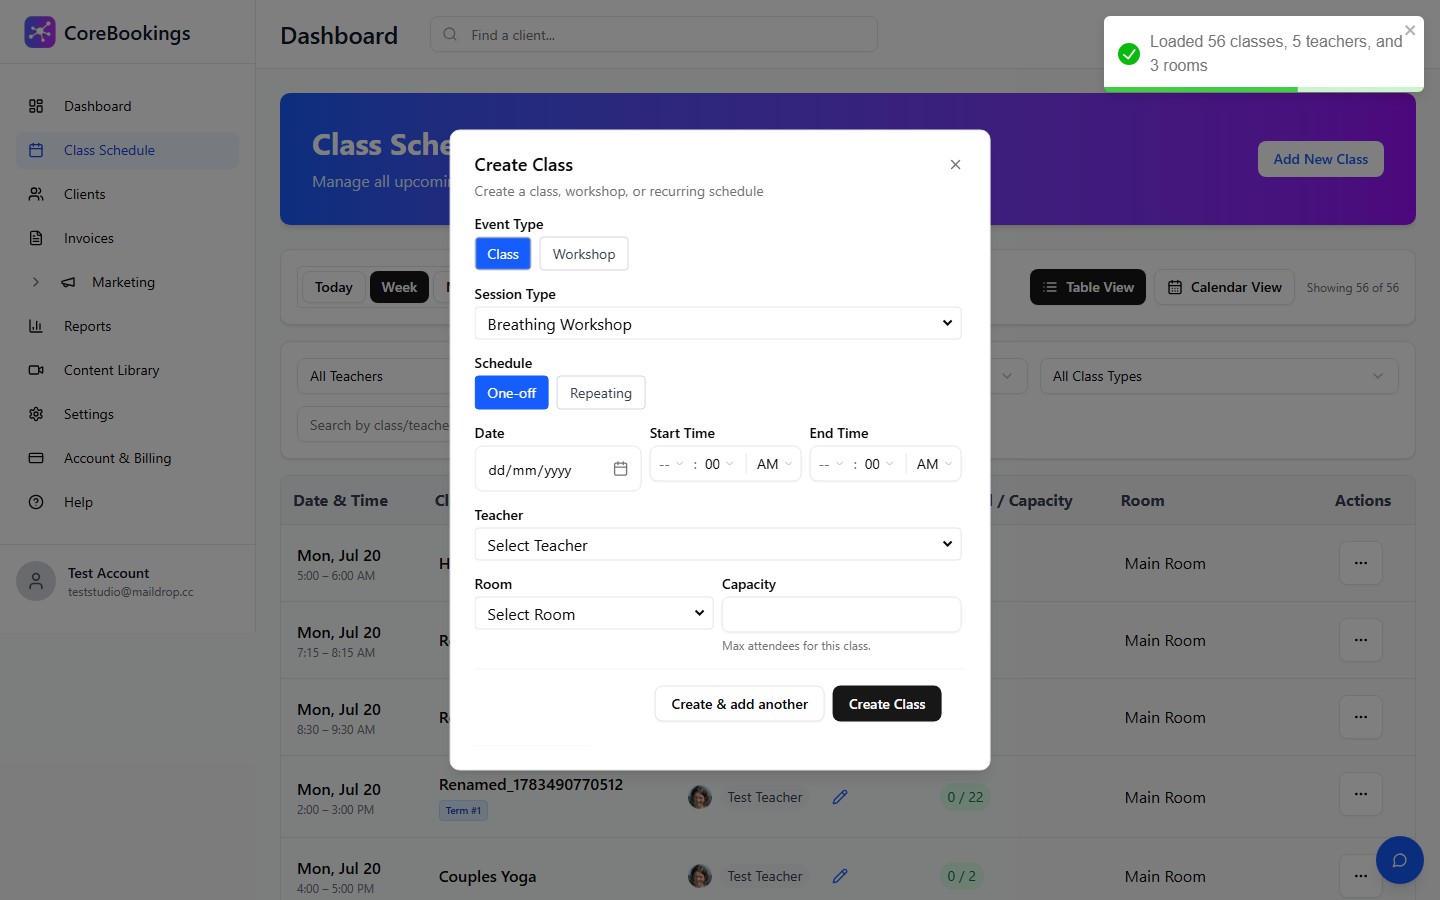
Open Class Schedule to view your timetable in table or calendar view. Click Add New Class to open the Create Class modal.
When creating a class, choose:
- Event Type: Class or Workshop
- Session Type, Teacher, and Room
- Date and time, plus One-off or Repeating schedule
- Capacity and any term settings that apply
If you have not added teachers, class types, or rooms yet, the modal links you to the right settings pages.
Public booking and website widget #
Once your studio URL slug is set in Settings → Business, clients can book at your Public URL. Copy it from Business Settings or from the dashboard after your activation checklist is complete.
To embed your schedule on your website, go to Settings → Add to Website. You will need your studio URL slug set first. The page provides the booking widget code and preview.
Clients can also find your studio in the CoreBookings mobile app, search your schedule, buy passes, and manage bookings from there.
Support #
Open Help in the dashboard sidebar for in-app assistance, or browse our help docs for step-by-step guides.
If you need more help, email support@kriya.com.au.


