
Teachers are the instructors you assign when you schedule classes. Add them under Settings → Teachers so they appear in the Teacher dropdown when you create or edit a class.
Before you start #
Only studio admins and owners can add or manage teachers. You need at least one active teacher before you can schedule a class.
Each teacher needs a unique email address. CoreBookings uses that email to create or link their dashboard login.
Add a new teacher #
Where: Settings → Teachers
- Open Settings in the left sidebar, then select Teachers.
- On the Teachers Directory page, click Add Teacher.
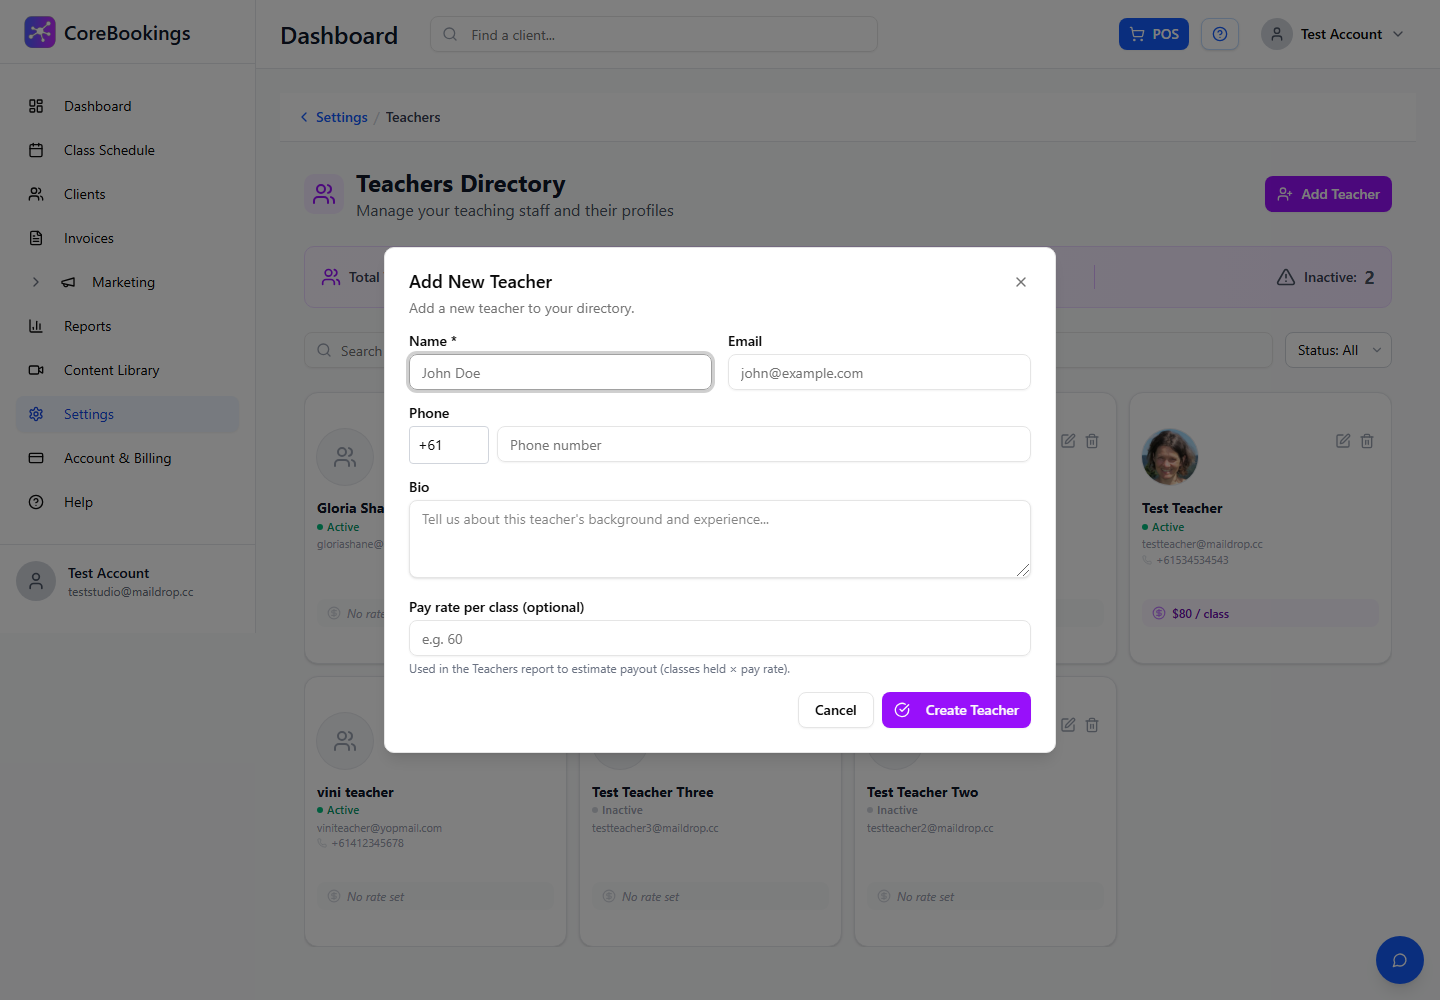
- Complete the Add New Teacher form and click Create Teacher.
Fields you can add when creating a teacher:
- Name (required)
- Email (required for new teachers)
- Phone
- Bio
- Pay rate per class (optional) — used in the Teachers report to estimate payout
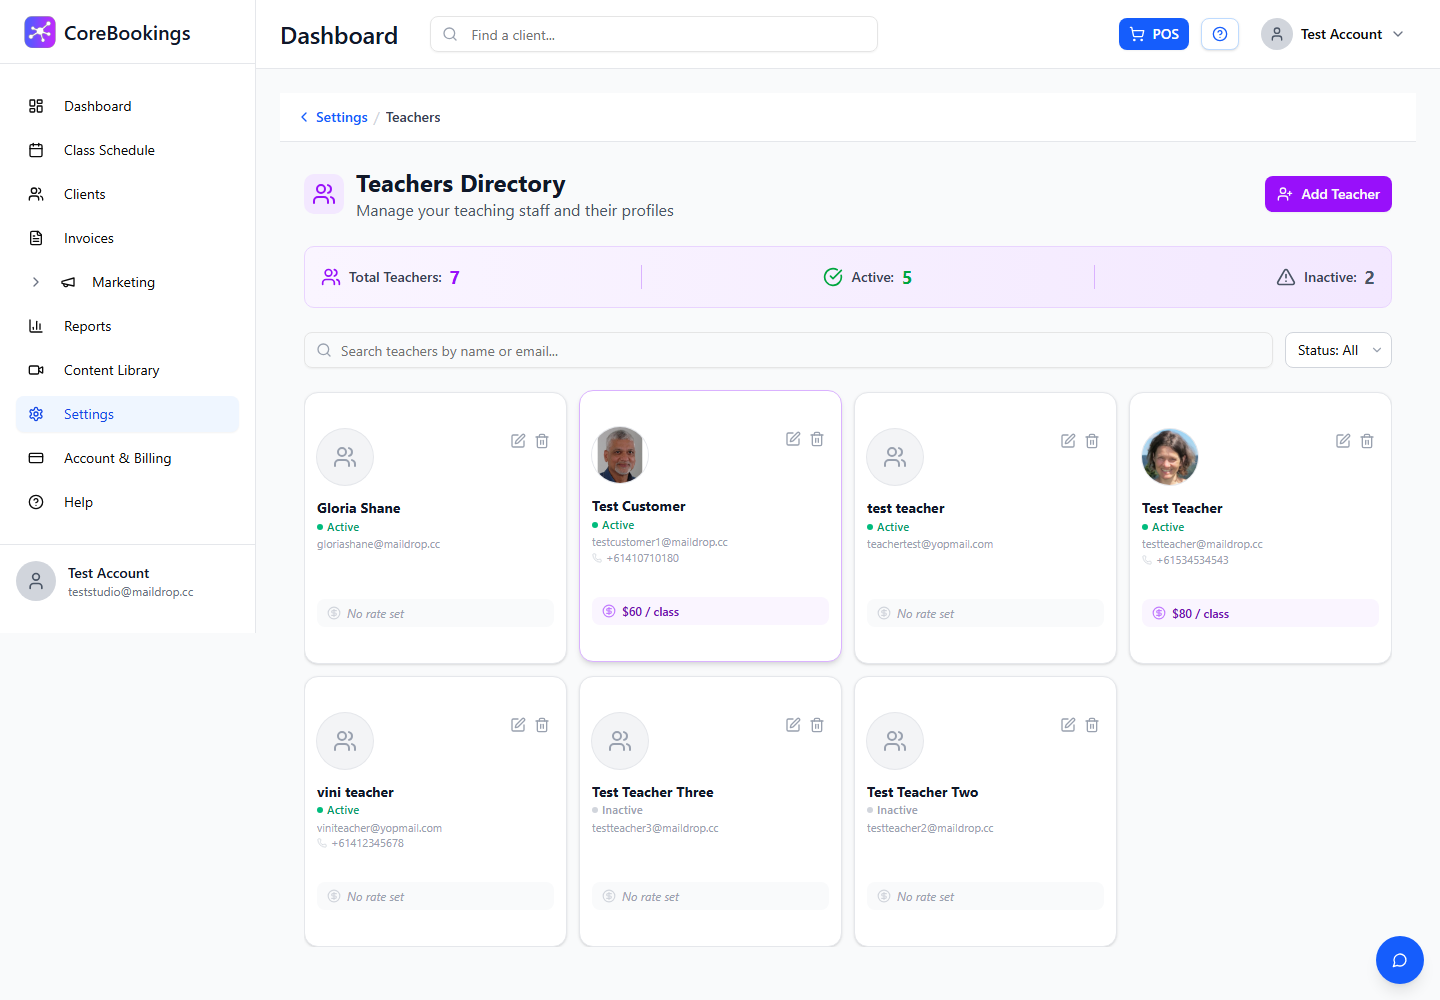
After you save, the teacher appears on the Teachers Directory page. Use the search box to filter by name or email, or use the Status: All filter to show Active or Inactive teachers only.
Teacher login and welcome email #
When you add a teacher with an email that is new to CoreBookings, the system creates a dashboard login and sends a welcome email with a temporary password. The subject line usually includes your studio name and who invited them.
The teacher signs in at your studio dashboard URL (the same staff login page you use as the owner). On first login they should set their own password. If they do not receive the email, ask them to check junk or spam, or use Forgot password on the login page.
If the email already belongs to an existing CoreBookings user, that account is linked to your studio as an instructor. No welcome email is sent and their existing password stays the same.
Teachers log into the dashboard, not the public client booking page or CoreBookings client app. From the dashboard they can open Class Schedule, view class rosters, and check clients in.
Edit or deactivate a teacher #
Click a teacher card on the Teachers Directory page, or click the edit icon, to open Edit Teacher. You can update their contact details, bio, pay rate, and profile photo, then click Update Teacher.
To stop a teacher appearing when you schedule new classes, open Edit Teacher and turn off Active Status. Their past classes and reports are kept.
To remove a teacher from the active list quickly, use the delete icon on their card. CoreBookings asks you to confirm deactivation. The teacher can be reactivated later from Edit Teacher.
Use teachers on your schedule #
Active teachers appear in the Teacher field when you create or edit a class on Class Schedule. Only active teachers are included in the dropdown.
If a different instructor is covering one class only, open that class on Class Schedule and choose Substitute Teacher from the actions menu. This updates that session without changing the rest of the recurring series.
Teacher names also appear on your public schedule and in the CoreBookings client app when clients browse classes.
Plan limits for teachers #
Each plan has a limit on active teachers:
- Solo: 1 active teacher
- Starter: up to 6 teachers
- Growth: up to 12 teachers
- Scale: unlimited teachers
If you reach your plan limit, CoreBookings shows a message that the teacher limit has been reached. Upgrade your plan from Account & Billing to add more active teachers.
Related help #
- Checklist to set up my account
- Getting started: guide to set up your account
- How to create a room or location
Need help? Email support@kriya.com.au.


