
In CoreBookings, your studio has one physical location (your studio address) and one or more rooms inside that location (for example Main Studio or Reformer Room). Rooms are required when you schedule classes.
Before you start #
Where: Settings → Location
CoreBookings does not support multiple separate studio locations in one account. If you run classes at more than one physical site, use a separate CoreBookings studio account for each location.
Within a single studio, you can create multiple rooms to represent different teaching spaces in the same building.
Set your studio address #
On the Location Settings page, complete Address Information under Studio Location:
- Address Line 1 (required)
- Address Line 2 (optional)
- City, State/Province, Postal Code, and Country (required)
Click Save Location when you are done. Your studio address is used for client communications and counts towards the Complete business profile activation step in onboarding.
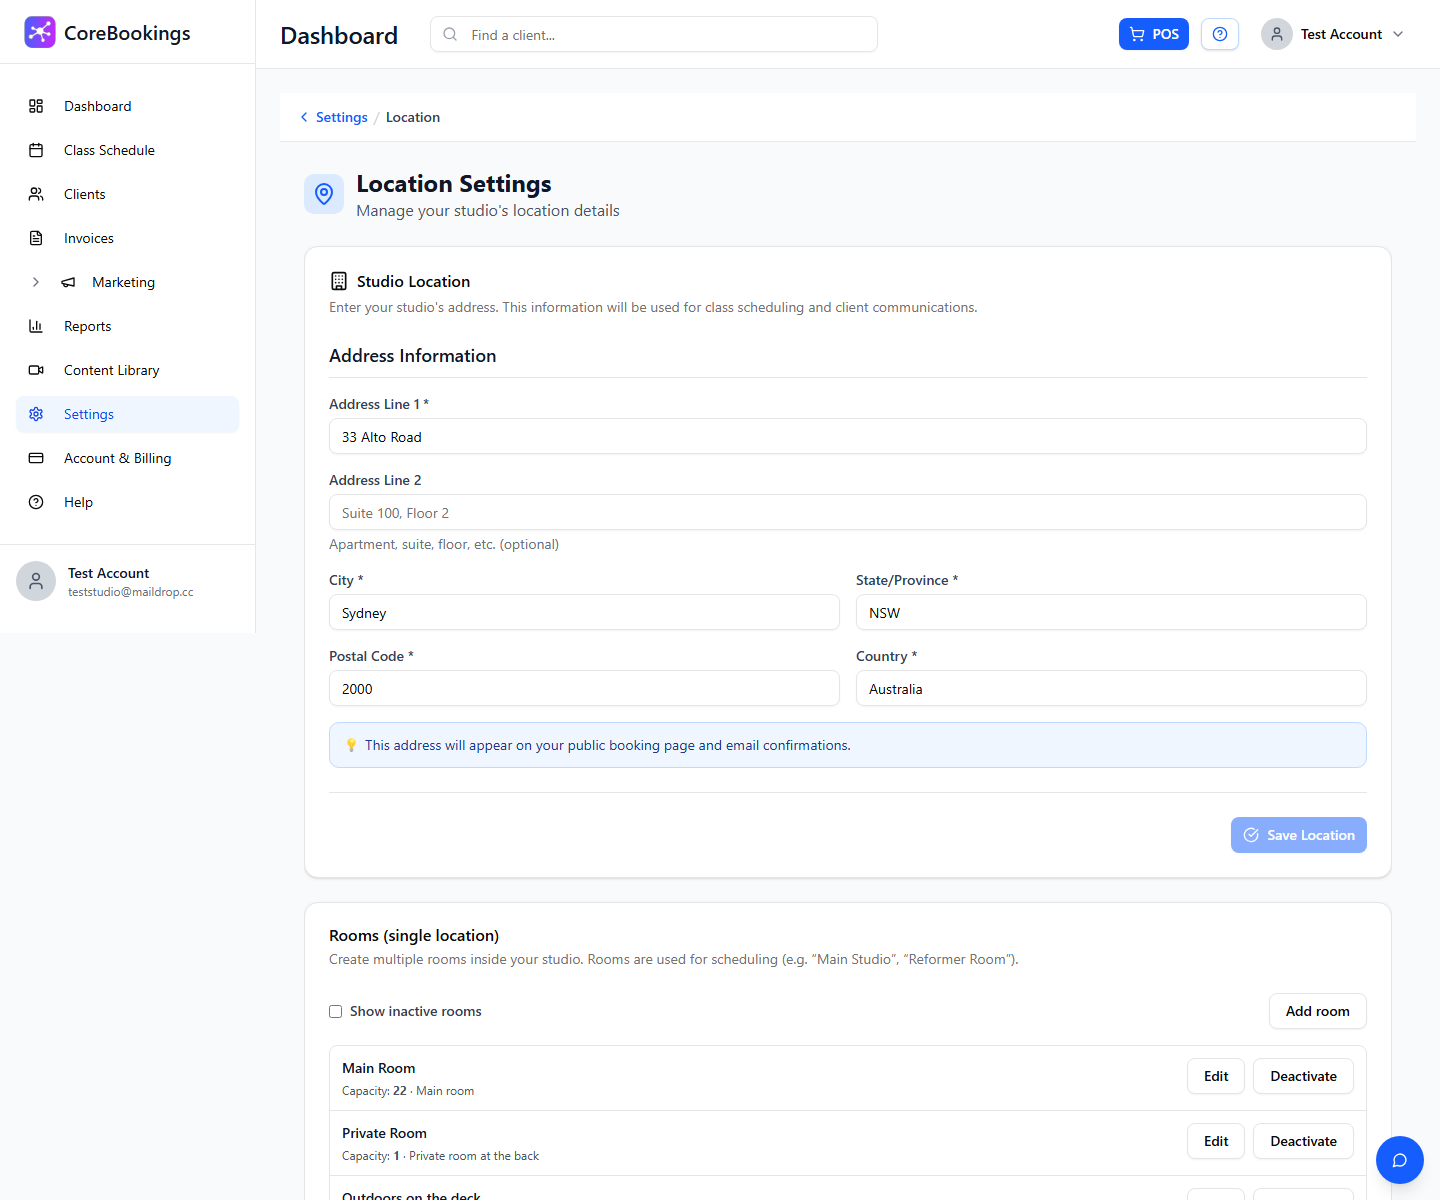
Add a room #
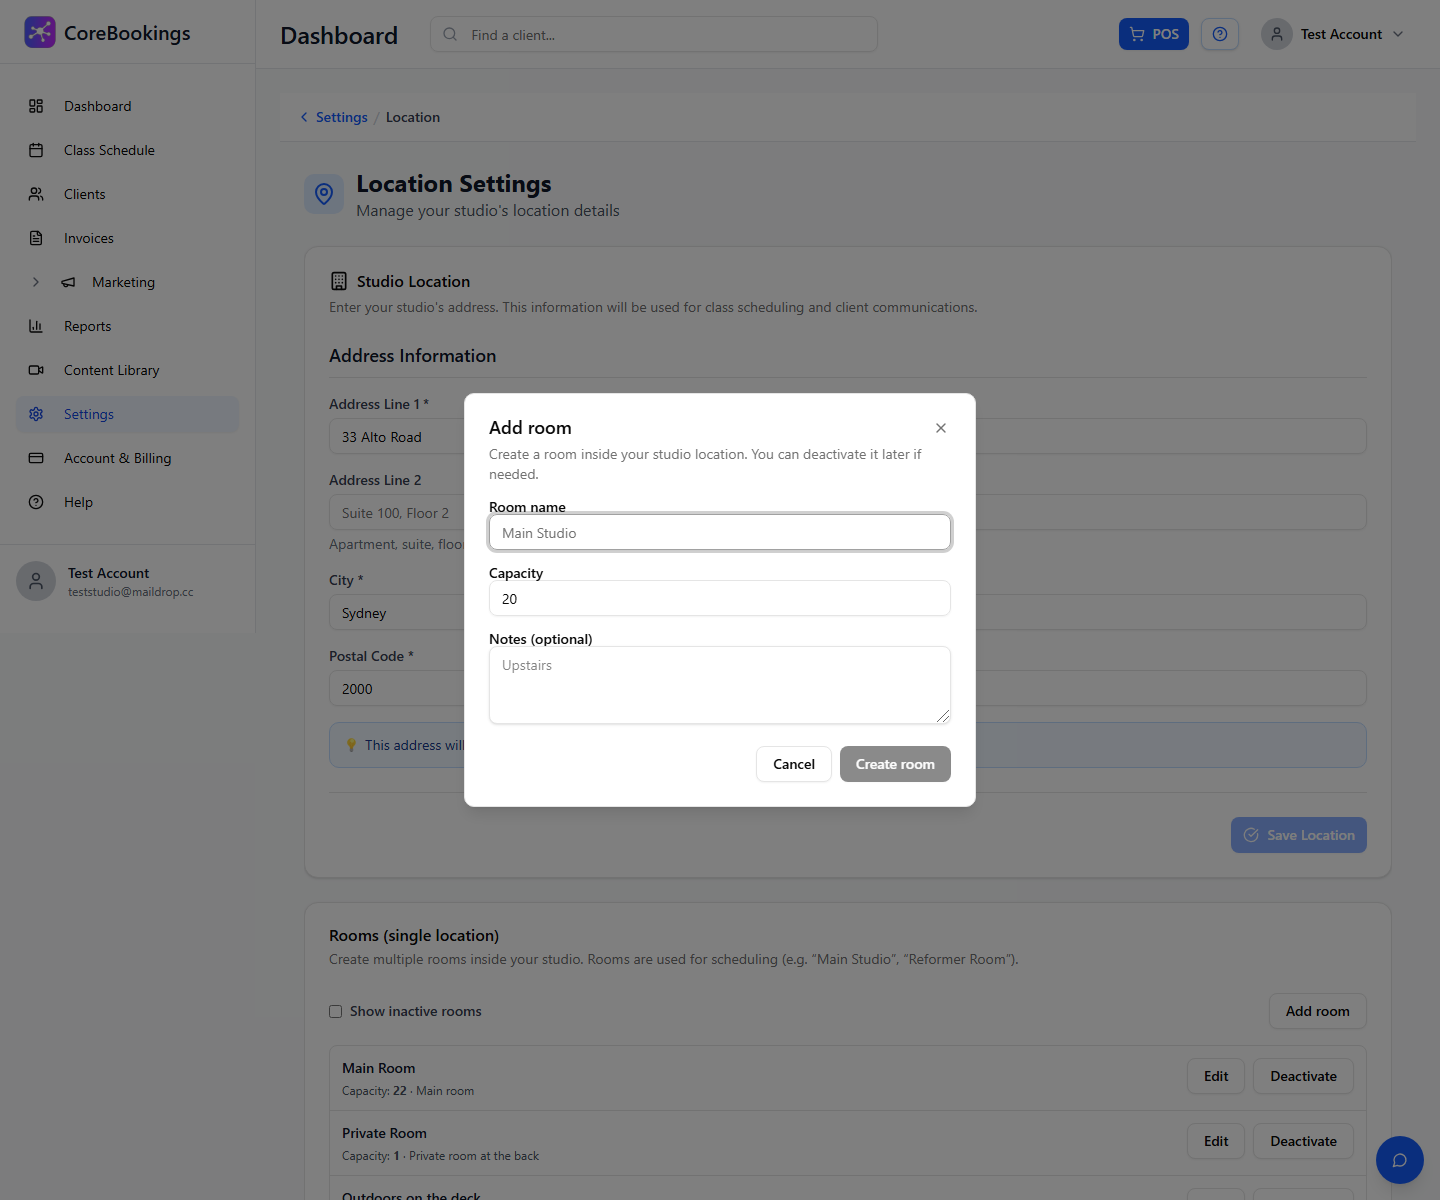
Scroll to the Rooms (single location) section on the same page. Click Add room, then complete the Add room dialog:
- Room name (required), for example Main Studio or Hot Room
- Capacity (required, 1 to 100)
- Notes (optional), for internal notes such as upstairs or equipment details
Click Create room. The room appears in the list and becomes available when you schedule classes.
If you have no rooms yet, the page shows: No rooms found yet. Add your first room to enable scheduling.
Edit or deactivate a room #
For an existing room, click Edit to update the room name, capacity, or notes, then click Save changes.
To hide a room from new class scheduling without deleting its history, click Deactivate. CoreBookings asks you to confirm: Deactivate this room? It will no longer be selectable for new classes.
Tick Show inactive rooms to see deactivated rooms in the list. Click Reactivate to make a room available again.
Use rooms when scheduling #
When you create or edit a class on Class Schedule, choose a Room from the dropdown. Only active rooms are shown.
A room's default capacity is used for scheduling. If you need a different capacity for one class only, change it on the class itself rather than editing the room (editing a room's capacity affects all classes scheduled in that room).
Plan limits for rooms #
Each plan has a limit on active rooms within your studio:
- Solo: 1 room
- Starter: 2 rooms
- Growth: 4 rooms
- Scale: unlimited rooms
If you reach your plan limit, upgrade from Account & Billing before adding more active rooms.
Related help #
- Checklist to set up my account
- How to add and manage teachers
- Getting started: guide to set up your account
Need help? Email support@kriya.com.au.


